The laptop sleeve market runs on a lie of convenience: that a single "13 inch" or "15 inch" designation tells a buyer everything needed to pick a protective pouch. It does not. Those numbers refer to the nominal screen diagonal, a marketing measurement that has almost nothing to do with the actual physical dimensions of the chassis wrapped around that screen. A modern 14-inch ultrabook can be slimmer and shorter than a 13-inch model from five years ago. A 15.6-inch gaming laptop can be nearly two inches wider than a 15-inch MacBook. Measuring for a sleeve means ignoring the sticker on the box and engaging with the machine as a physical object, the same way one measures a frame for a painting or a foot for a boot.
The stakes of getting it wrong are modest but irritating. A sleeve that is too tight refuses the laptop at the last quarter-inch, demanding a shove that feels violent every single time. A sleeve that is too loose lets the machine rattle around inside, which defeats the entire purpose of a fitted pouch and invites the corners to grind against the zipper hardware. Neither failure is catastrophic, but both are avoidable with five minutes and a tape measure.
The Four Numbers That Actually Matter
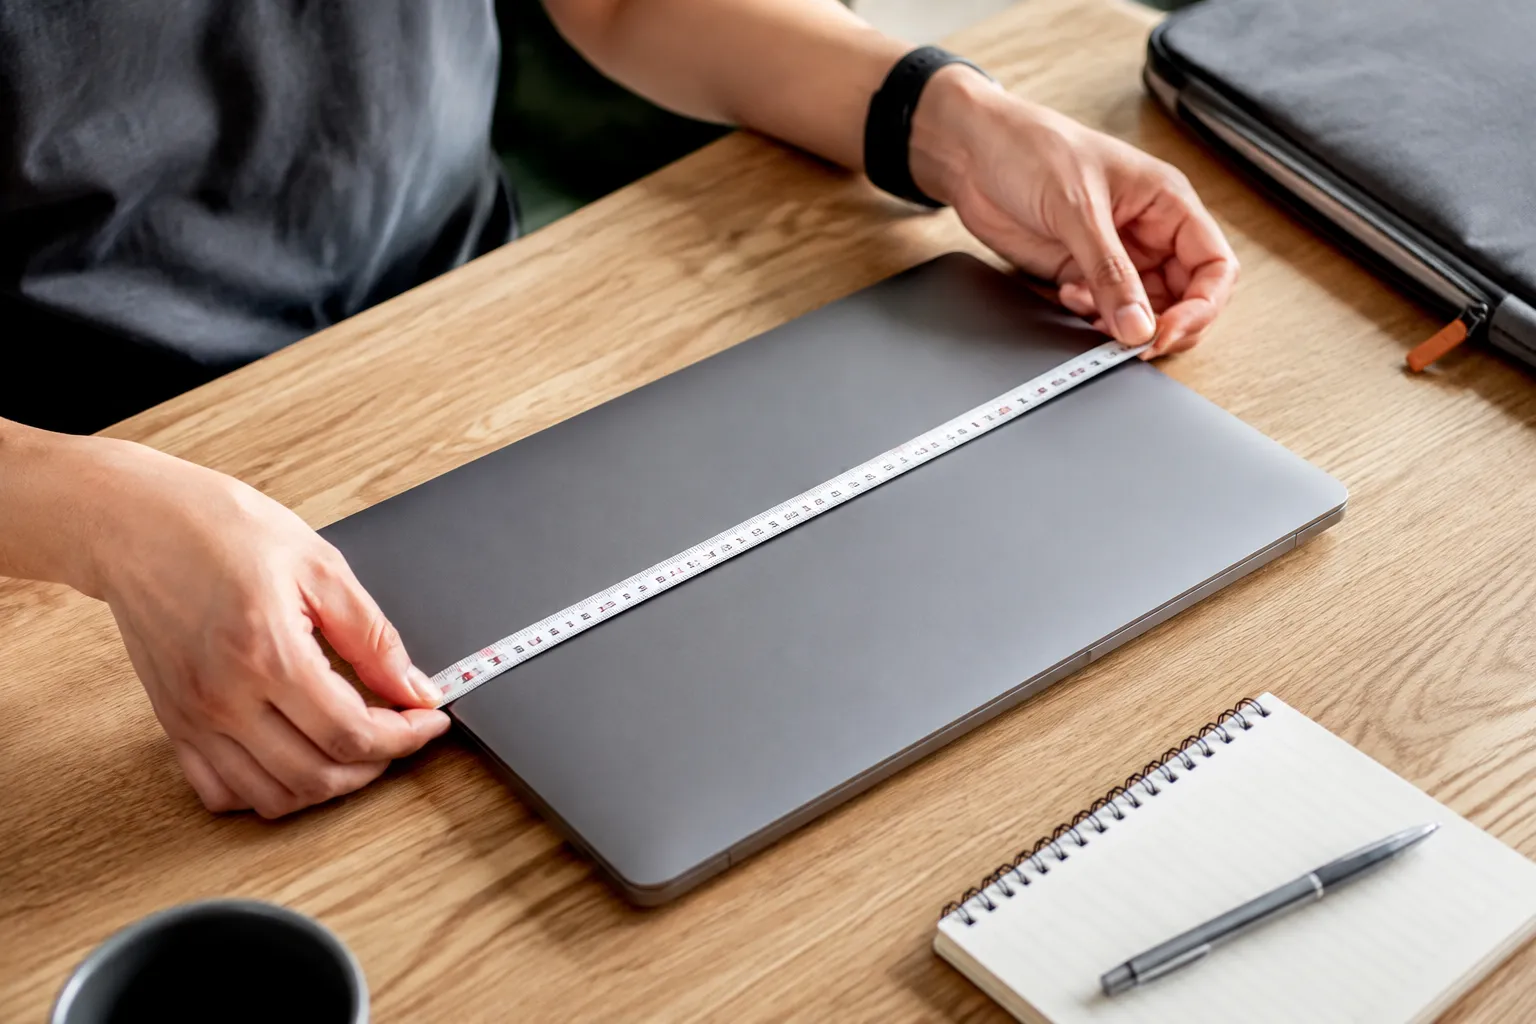
Forget the screen size. A laptop sleeve needs to accommodate the full exterior dimensions of the closed machine, and those are defined by four measurements: width, depth, thickness, and corner radius. The first three are straightforward. Lay the laptop flat on a table with the hinge facing away and the lid closed. Width is the distance from the left edge to the right edge across the keyboard side. Depth is the distance from the front edge (where the palm rest sits) to the back edge (where the hinge is). Thickness is measured with a ruler held vertically against the side of the closed unit, from the table surface to the highest point of the lid.
Corner radius is the measurement almost everyone skips, and it is the one that causes the most frustrating near-misses. Many modern laptops, particularly premium ultrabooks, have tightly rounded corners, a curve of roughly 5 to 10 millimeters. Cheaper and older machines often have sharper, squarer corners. A sleeve with a square internal corner will reject a round-cornered laptop, or worse, the fabric will bunch and strain at the corners while the middle stays loose. Some sleeve manufacturers publish corner radius specifications; most do not. When the spec is absent, the practical workaround is to measure the laptop's own corner curve with a flexible ruler or a piece of paper, then choose a sleeve known for a relaxed, slightly oversized fit rather than a precise glove-like one.
Reading the Manufacturer's Spec Sheet Without Being Misled
The product page for a laptop lists dimensions in millimeters, usually presented as height by width by depth. That first figure, the height, is almost always the thickness when the machine is closed. The width and depth correspond to the physical footprint. This is the reliable data, yet many buyers never scroll down to it because the marketing copy leads with the screen size and the weight.
There is a catch hidden in the fine print. The listed dimensions frequently exclude the rubber feet on the bottom and the hinge protrusion at the rear. A laptop that measures 15.9 millimeters thick on the spec sheet can sit 2 millimeters higher once the rubber strips are factored in. The hinge, especially on convertibles and models with a visible rear exhaust vent, often extends a few millimeters past the back edge. These small additions matter because a properly fitted sleeve has almost zero tolerance for anything that increases the chassis size. The workaround is to add 3 to 5 millimeters to every spec-sheet dimension before comparing it to a sleeve's internal measurements. That padding accounts for the feet, the hinge, and the fact that a closed laptop is rarely as flat as the CAD drawings suggest.
Sleeve Sizing Systems: Inches, Centimeters, and the Chaos Between
Sleeve manufacturers have settled on a sizing convention that serves their inventory system rather than the buyer. A sleeve labeled "13-14 inch" does not promise to fit every 13- and 14-inch laptop; it promises to fit a range of chassis widths that the manufacturer has decided cluster around that label. The actual internal dimensions are what matter, and those are printed in the product description, usually in the tab marked "Specifications" or buried in a Q&A response.
This is where the unit confusion creeps in. A sleeve made for the Asian market might list internal dimensions in centimeters; a sleeve made for the American market uses inches. A 34-centimeter internal width converts to 13.4 inches. A buyer with a laptop that is 31.5 centimeters wide (12.4 inches) will find that the sleeve labeled "13 inch" fits perfectly, while the sleeve labeled "12 inch" from a different brand is too tight. The only sane approach is to convert everything to millimeters and compare directly. There are 25.4 millimeters in an inch, and any phone calculator handles the arithmetic in seconds.
The deeper problem is that the sleeve industry has no universal standard for what "fits" means. Some brands design their sleeves with a deliberate 5 to 10 millimeter gap on every side, so the laptop slides in easily and rests against a padded interior. Others make the internal dimensions nearly identical to the laptop's exterior, relying on the stretch of neoprene or the give of the fabric to accommodate the device. A neoprene sleeve with tight dimensions will stretch to fit a slightly larger laptop. A hard-shell or leather sleeve with tight dimensions will not stretch at all, and the laptop will not go in. Reading reviews for the specific sleeve, rather than trusting the size label, reveals which philosophy a given product follows.
The Paper Template Method
There is a low-tech method that resolves every ambiguity before money changes hands. Take a sheet of paper, lay the closed laptop on it, and trace the outline with a pencil held vertically against the edges. Cut out the tracing, then fold it in half lengthwise to find the centerline. When shopping online, hold that paper cutout against the screen while viewing a sleeve's product images; the relative proportions become obvious immediately. A sleeve that looks long and narrow in the product photo will mismatch the cutout in a visible way.
The paper method has a second use that is even more valuable. When a sleeve arrives and the fit is in question, the cutout can be slipped inside the sleeve before the laptop ever touches the fabric. If the paper slides in freely and lies flat, the laptop will fit. If the paper bunches or catches at the corners, the laptop will fight the sleeve, and the return process can start without the risk of scuffing the machine against an interior seam. This trick costs nothing and prevents the most common sleeve mistake, which is forcing a laptop into a marginally too-small pouch and abrading the aluminum edges in the process.
Where the Extra Millimeters Hide
Beyond the feet and the hinge, there are other protrusions that throw off a measurement. A laptop with a security lock slot has a small metal reinforcing plate around that cutout, which can add half a millimeter to the side profile. Laptops with a wedge-shaped design, thicker at the hinge and tapering toward the front, complicate thickness measurements because the spec sheet lists the thickest point. A sleeve that accommodates that thickest point will have loose fabric at the thin front edge, which is acceptable but worth knowing in advance.
Charging port placement matters in a way that surprises nobody until it actually matters. A laptop with a USB-C charger on the right side, near the front edge, will develop a lump in a sleeve if the user stores the charger in the same pouch. Some sleeves have a dedicated external pocket for accessories, and that pocket runs the full length of the sleeve's front face. Laptops with a thick charging port on the same side as the pocket will press against the accessory, creating a pressure point that can crack a screen over time if the sleeve is packed tight in a bag. Measuring the laptop's port protrusion and comparing it to the sleeve pocket's position is a detail that prevents a slow, invisible failure.
The Zipper and the Lip
A zipper opening reduces the usable internal space of a sleeve more than most buyers expect. The zipper track itself sits inside the fabric layers, and the opening created when the zipper is fully open is always smaller than the sleeve's maximum internal dimension. A laptop that matches the internal width spec exactly will catch its corners on the zipper teeth during insertion. The rule of thumb is to leave at least 5 millimeters of clearance on the width dimension to ensure the laptop passes through the zipper opening without scraping.
The lip, the fabric edge that wraps over the opening to protect the zipper from scratching the laptop, consumes another few millimeters. Some sleeves have a substantial overlapping flap that folds over the top edge; others have a minimal trim. The lip reduces the effective depth of the sleeve, so a laptop that fits the internal depth spec on paper may sit slightly proud of the opening, leaving the top edge exposed. This defeats the protective purpose. The practical fix is to choose a sleeve whose internal dimensions exceed the laptop's dimensions by at least 10 millimeters in both width and depth, and to treat thickness as a separate consideration that depends entirely on the sleeve material's flexibility.
Material Behavior Changes the Fit Over Time
A sleeve's internal dimensions on day one are not the same as its dimensions six months later. Neoprene stretches and conforms, which means a snug fit loosens into a comfortable fit within a few weeks. Leather and hard-shell materials hold their shape, so a fit that is snug on arrival stays snug for the life of the product. Wool felt and other woven materials have a small amount of give but relax gradually, settling into the laptop's exact silhouette. These behaviors matter for the measurement strategy. A buyer who measures precisely and orders a sleeve with only 2 millimeters of clearance will end up with a loose pouch in neoprene and an impossible one in leather.
The other material factor is interior lint and abrasion. A sleeve lined with soft microfiber or fleece has a higher coefficient of friction than a slick nylon lining. A laptop that fits with a few millimeters of clearance slides in easily against a low-friction lining but drags and crumples against a high-friction one. The drag is not a disaster; it just means the insertion requires a straight, steady push rather than a casual drop. But for a person who pulls a laptop out of a sleeve a dozen times a day in meetings and coffee shops, that extra second of careful alignment becomes a small daily annoyance. Choosing a sleeve with a slick interior and a slightly loose fit is the better long-term move for frequent use.
When the Sleeve Is the Wrong Shape Entirely
Some laptops have proportions that no standard sleeve accommodates. A 17-inch workstation laptop with a numeric keypad is wider than a typical 17-inch sleeve, which often assumes a more square aspect ratio. An ultraportable with an extremely thin profile, under 12 millimeters, will swim inside a sleeve designed for a thicker machine of the same footprint. Convertible laptops with a 360-degree hinge are often a few millimeters thicker at the hinge than their non-convertible counterparts, and that hinge bulge creates a teardrop profile that standard sleeves do not match.
For these odd shapes, the only honest solution is a custom sleeve or a sleeve from a maker that offers size variations based on exact model numbers. Several small manufacturers produce sleeves built around specific laptop models, using the OEM chassis drawings to create a precise fit. These cost more than generic sleeves, sometimes two or three times more, but they resolve the measurement problem entirely because the manufacturer has already done the work. The buyer simply selects the laptop model from a dropdown menu. This approach has its own risk: if the manufacturer's drawing is based on an early engineering sample and the shipping laptop has a revised hinge or a different port arrangement, the custom sleeve will be wrong in exactly the same way a generic one would be, just with a higher price tag.
The Measurement Habit Worth Keeping
Anyone who has owned more than two laptops knows that the upgrade cycle brings a new set of dimensions every time. The habit of recording the four key measurements on a sticky note and keeping it inside the laptop bag, or in a notes app, saves the whole research process from scratch at the next purchase. A person who knows their current laptop is 312 by 222 by 15.9 millimeters can compare that against a potential new machine's spec sheet in seconds, without opening a tape measure. That comparison reveals whether the existing sleeve collection will carry over or whether a new one is part of the true cost of the upgrade. The measurement is the one piece of data that makes every sleeve decision afterward a matter of direct comparison rather than guesswork.
A final note on the measuring tape itself: a cloth tailor's tape is the wrong tool for this job because it stretches and drapes. A rigid metal ruler or a digital caliper gives the honest numbers. The laptop sits on a flat table, the ruler presses against the edge, and the reading is taken at eye level to avoid parallax error. It takes ninety seconds. It prevents a return shipping label, a week of waiting, and the particular disappointment of a sleeve that almost fits.